



Cross Bars for Standard Stretcher Bars (Certified)
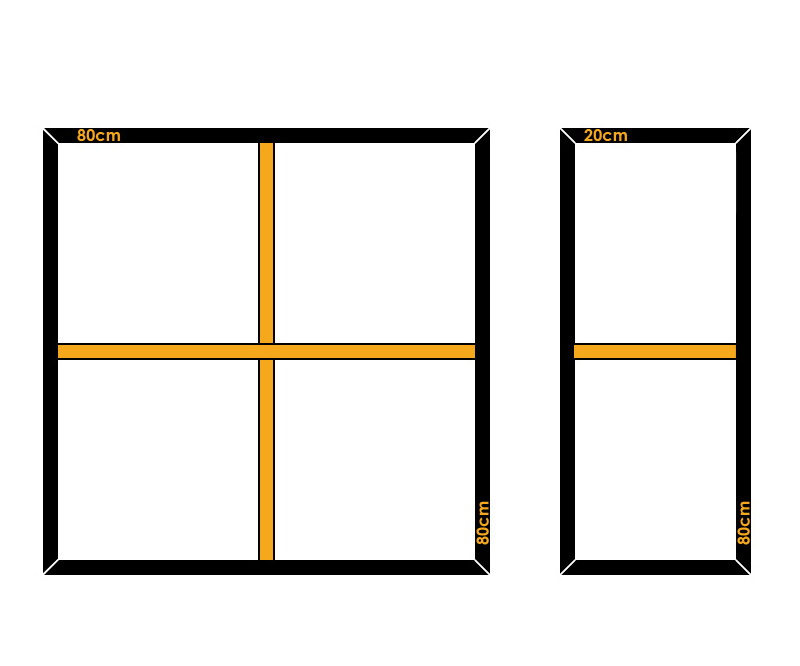
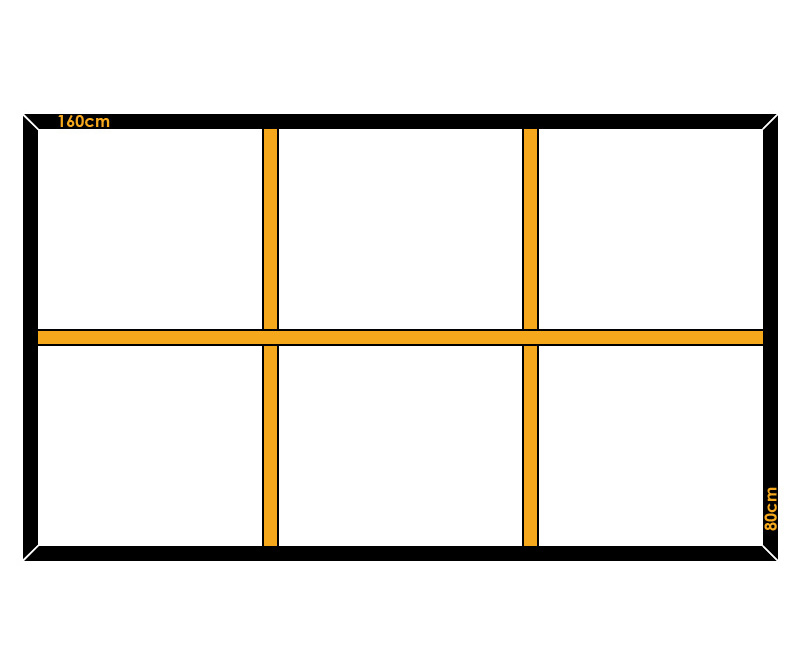
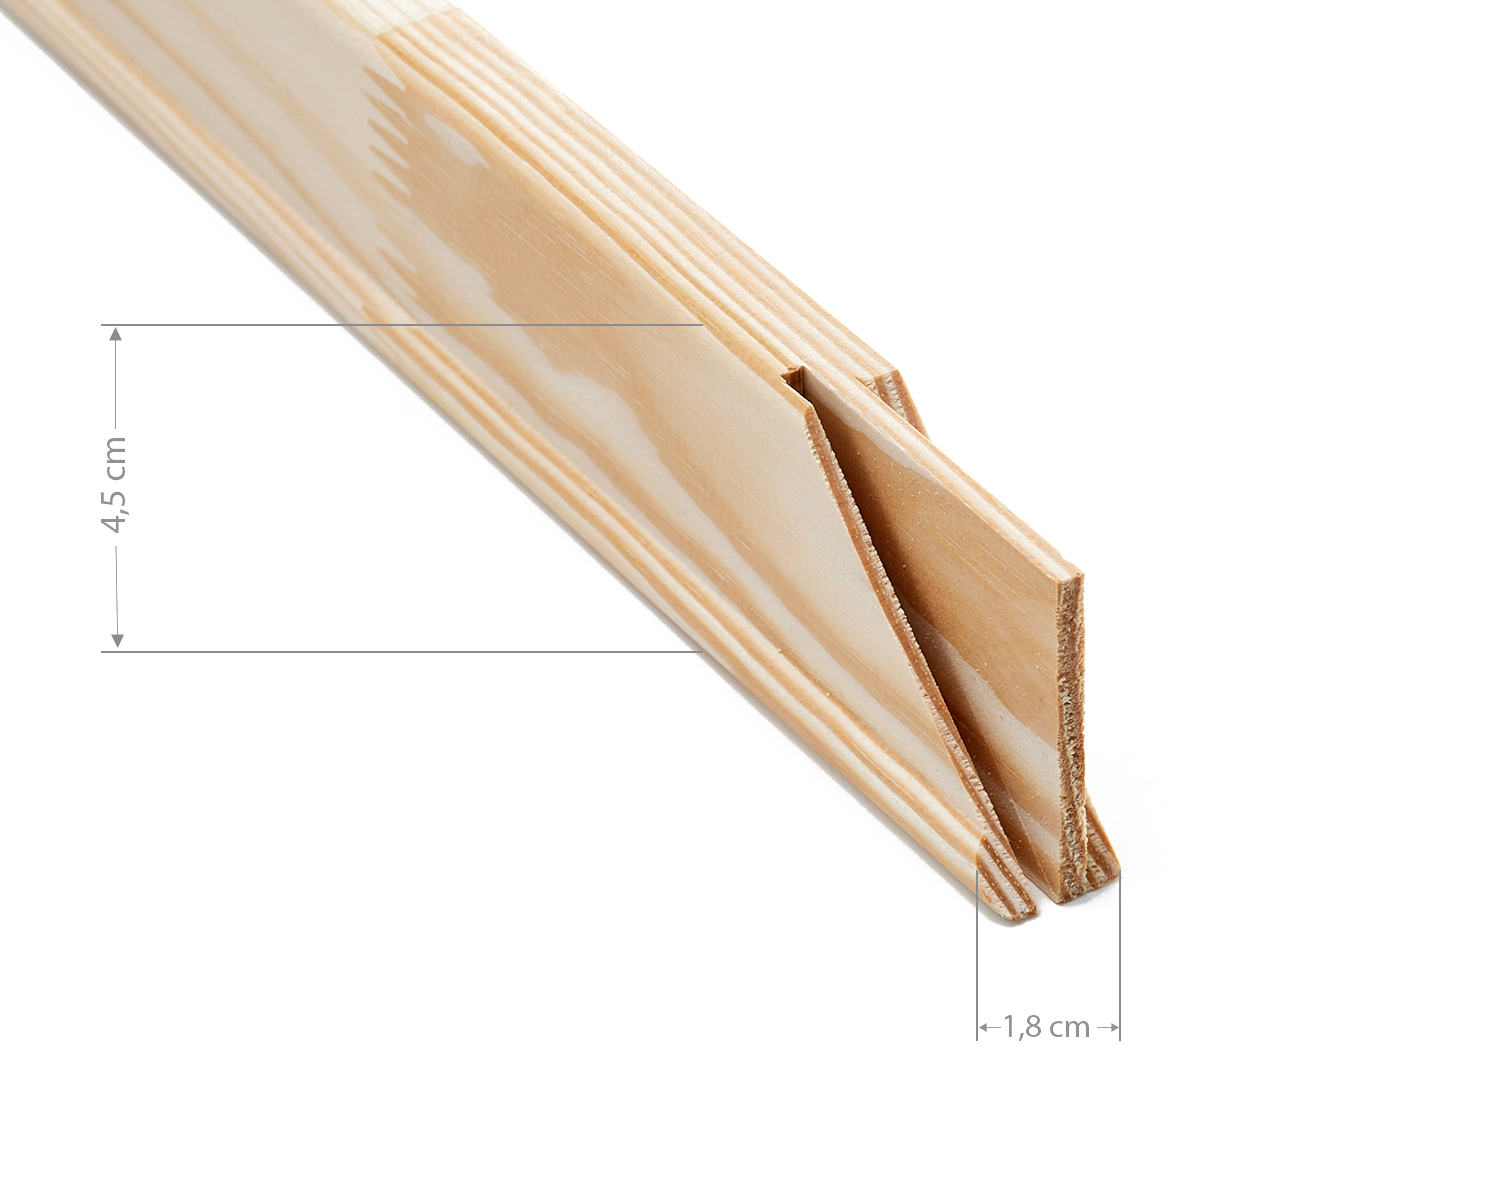
Cross bars (also called cross pieces or cross braces) reinforce stretcher frames from a side length of 80 cm. Our Standard bars have one slot for a cross bar from 80 cm and two slots from 160 cm. From a length of 80 cm, the cross bars themselves also have a notch so that they can be joined to form a cross. This keeps the frame stable and free from warping for the long term.
Important: the length you select refers to the length of the stretcher bars, not the actual length of the cross bar. To fit the frame precisely, the cross bars are made slightly shorter. Example: if you order a 100 cm cross bar, the actual length is approx. 96 cm. It therefore fits 100 cm stretcher bars exactly.
- Made in Germany
- Finger-jointed
- FSC certified wood
- Profile: 4.5 cm wide x 1.8 cm deep (or thick)
👉 Our stretcher frame calculator quickly works out how many bars and cross bars you need for your format.
Frequently asked questions about cross bars
What do I need a cross bar for?
Why are the cross bars shorter than ordered?
When is a cross joint needed?
What are the dimensions of the cross bars?
Do cross bars need wedges?
How many cross bars do I need?
| Compatibility: | For stretcher frames with Standard bars |
|---|---|
| Features: | Finger-jointed |
| Manufacturing: | Made in Germany |
| Material: | Spruce |
| Notch: | From 80 cm: one notch. From 160 cm: two notches for intersecting cross braces |
| Profile: | 18 x 45 mm (Standard) |
| Size Increments: | 1 cm steps up to 120 cm / 5 cm steps up to 200 cm / 10 cm steps thereafter |
| Sustainability: | FSC-certified (sustainable forestry) |
Stretched canvases can be ordered as standard up to the following dimensions:
- shorter side: max. 160 cm
- longer side: max. 300 cm
A size of 160 × 300 cm can therefore be ordered directly in the online shop. Larger sizes where the short side exceeds 160 cm, for example 180 × 200 cm or 200 × 300 cm, are no longer available as standard for organisational and shipping reasons.
Alternative 1: assemble and stretch it yourself
If you assemble and stretch the stretcher frame yourself, sizes up to 200 × 300 cm are still possible. To do this, order the matching stretcher bars and a canvas roll separately.
Larger sizes only for large-scale projects
We cannot offer ready-stretched canvases outside these size limits as single items or in small quantities. A review only makes sense for large-scale projects with high quantities, where all stretched canvases can be delivered together, without individual cardboard packaging, by separate consolidated transport to one delivery address.
For complete beginners, we recommend our Basic Cotton Student Canvas. This canvas offers good quality at a fair price and is versatile – ideal for painting classes, getting started with painting and many other creative uses. It is suitable for all types of paint.
- 75% cotton, 25% polyester
- Fabric weight: 250 g/m²
- Texture: medium texture, soft to the touch
The right canvas size depends on the subject, the room and the intended use. Small sizes such as 20×30 or 30×40 cm are well suited to studies, sketches or compact series. Medium sizes such as 50×70 cm or 60×80 cm are true all-rounders – ideal for portraits, landscapes or modern art.
Large canvases from 100×100 cm make a particularly strong impression as standalone pieces on larger walls.
Why does the aspect ratio matter?
As well as the size, the aspect ratio plays a role. Landscape formats feel calm and expansive, portrait formats more dynamic and full of tension. Square canvases give the subject a balanced, modern look.
Which formats used to be popular?
Traditional ratios such as 4:3 or 3:2 shaped painting for a long time – especially for landscapes and classic portraits. The golden ratio (approx. 1:1.6) was also common in art.
Square sizes such as 40×40, 80×80 or 100×100 cm are currently in high demand – they look modern and harmonious. Classics such as 50×70, 60×80, 80×100 or 100×120 cm also remain popular – versatile and suitable for many creative works.
Order increments for Standard stretcher bars and Standard cross braces:
- 1 cm increments up to 120 cm
- 5 cm increments from 120 to 200 cm
- 10 cm increments from 200 to 300 cm
Order increments for XXL stretcher bars and XXL cross braces:
- 5 cm increments up to 200 cm
- 10 cm increments from 200 to 300 cm
Basic stretcher bars and Basic cross braces are only available in fixed lengths up to a maximum of 120 cm.
Note: Stretcher bars and cross braces cannot be shortened or made to custom lengths. The bars are pre-made in the specified standard lengths – including milled tongue, groove and mitre cut. That's why only the lengths that can be selected in the shop can be ordered.
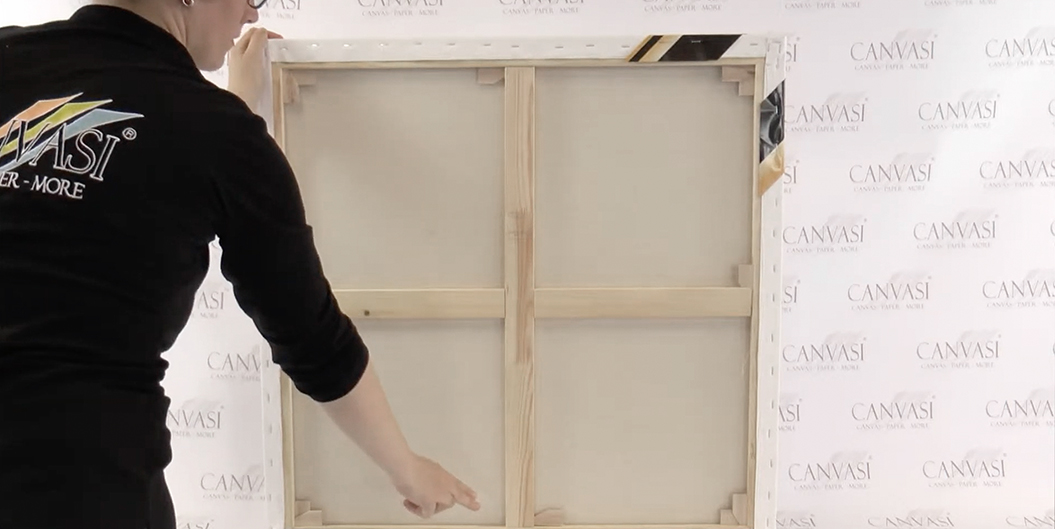
We recommend fitting a stabilising cross brace from a side length of 80 cm, and at the latest from 100 cm. Canvasi stretcher bars from a length of 80 cm have a slot for the cross brace, also called a centre bar or crossbar. From a length of 160 cm, two slots are milled in. The cross braces in turn have a notch for the crossing joint from a length of 80 cm, so that you can assemble your stretcher frame accurately.
Tip: Use the Stretcher Frame Calculator to find out which stretcher bars and cross braces you need for your stretcher frame.
Yes, with three exceptions, our stretched canvases and canvas rolls are pre-primed twice and ready to paint. They have a universal acrylic primer made from white titanium dioxide and resin.
Exceptions:
- Natural Cotton: unprimed
- Natural Linen: clear primed
- Black Cotton: black primed
For most applications with acrylic or oil paints, priming is highly recommended. It protects the canvas fabric – usually cotton or linen – from paint media soaking in and creates an even surface. Paints adhere better and look richer and more brilliant.
Many ready-stretched canvases already come with a layer of gesso applied at the factory and can be painted on straight away. Nevertheless, some artists like to apply extra layers to influence the texture or paint application individually.
In certain cases – for example with experimental techniques or mixed media work – it can also be interesting to work without primer on purpose. This creates quite distinctive effects and surfaces. If you choose this approach, be aware that the behaviour of the paint and the nature of the canvas differ significantly from primed versions.
Conclusion: for classic acrylic or oil painting, priming makes sense in most cases. It improves paintability and ensures good, long-lasting results. If you want to experiment creatively, you can also use unprimed canvases – depending on your technique and the effect you want.
To prepare your canvas properly, we recommend applying very thin layers of gesso. Thickly applied gesso dries more slowly, and while it dries the canvas fabric can shrink unevenly, which causes ripples. So gesso is applied in several thin layers. If the emulsion is too thick for you, you can thin it with a little water (maximum ratio 80:20) to make it flow better.
Steps:
Check the canvas tension: make sure the canvas is properly stretched on the frame before applying gesso.
Apply thin layers: apply the gesso in several thin layers rather than one thick layer. Apply the first layer horizontally from the centre outwards. Make sure you spread the gesso evenly over the entire canvas surface to avoid differences in tension.
Let each layer dry completely before applying the next. The drying time of Canvasi gesso primer is approximately one hour for a thin application of 0.13 mm. The actual time depends on the temperature and humidity.
Once dry, apply the second layer. This time, work vertically. Once the second layer of gesso has also dried, you can sand the primer if needed. Work in circular movements and use progressively finer sandpaper.
Adjusting the canvas tension afterwards can help to smooth out any ripples.
Find out more about gesso primer in our guide article.
Here we explain step by step how to stretch a painted, rolled canvas onto a stretcher frame yourself.
What you need
- 4 stretcher bars and cross braces if needed
- Staple gun with suitable staples
- Rubber mallet
- Canvas pliers (optional)
Ordering the right stretcher bars
1. Determine the size
- Measure the painted area of your canvas and the unpainted margin for wrapping round.
- Enter both values in our Canvas Stretching Calculator. It shows you the right stretcher frame size.
2. Allow for extra fabric
- Standard bars: 5–6 cm of fabric overlap per side
- XXL bars: 7–8 cm of fabric overlap per side. At 4 cm, XXL bars are twice as deep as standard bars – so you need more fabric per side to wrap round.
3. Choose the bar length
- Standard bars: Order four Standard stretcher bars, each 10–12 cm shorter than the total size of the canvas.
- XXL bars: For our XXL bars , we recommend a difference of 14–16 cm. Because XXL bars are deeper, more length has to be deducted.
4. Check stability (cross brace)
- For larger sizes, a cross brace (also called a “centre bar”) provides extra stability.
- From a side length of around 80 cm, we generally recommend using a cross brace. Use our Stretcher Frame Calculator for this.
Assembling the stretcher frame & stretching the canvas
5. Assemble the frame
- Slot the bars together at the corners
- Align the frame at right angles
- Carefully tap the joints together with the rubber mallet
- The raised lip (rounded edge) faces upwards
- Insert the cross brace in the centre, if you are using one
▶ External video (in German): assembling a stretcher frame
6. Stretch the canvas
- Place the canvas face down on a clean surface
- Position the frame centrally on the canvas
- First staple the middle of one long side
- Then the opposite side
- Then the two short sides
- Make sure the tension is even
▶ External video (in German): stretching a canvas correctly
7. Fold the corners & insert the wedges
- Fold the corners neatly inwards and staple them
- Insert the wedges with the bevelled side facing the frame
- Carefully tap the wedges in with the mallet
Two wedges per bar are already included.
Kunden kauften auch diese Artikel

From €114.90
incl. VAT plus shipping costs

From €199.90
incl. VAT plus shipping costs